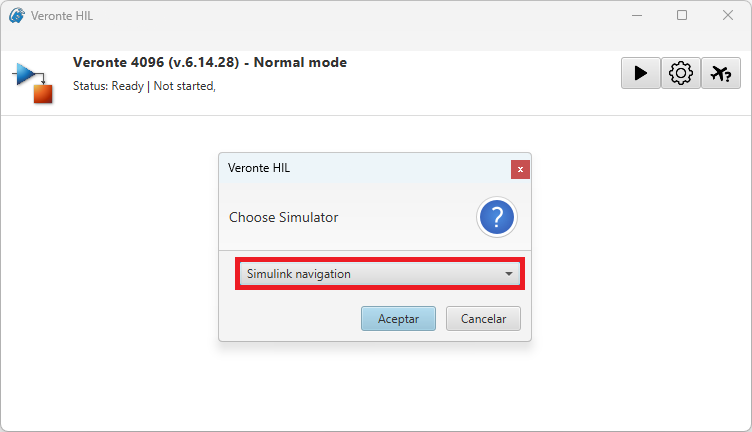
Simulink Navigation
HIL Simulator enables simulation with Simulink software for a physical autopilot.
With this simulation option, users can integrate the autopilot into their Simulink workspace, achieving a simulation as flexible and complex as they intend to design in this environment.
Important
HIL Simulator is the tool to establish the connection between Veronte Autopilot and a simulation Simulink model. The design of the undertaken simulation in Simulink must be programmed by users according to their considerations.
This section summarizes the operation with Simulink Navigation.
Data blocks
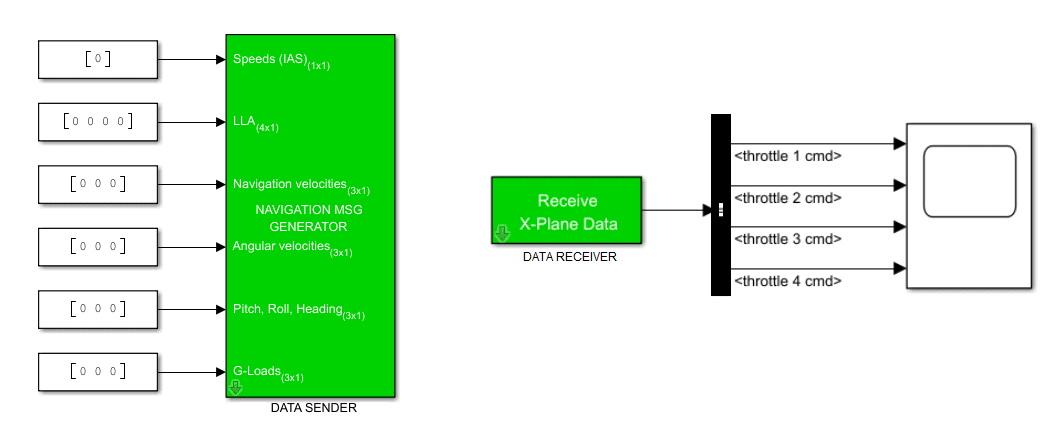
The communication of Veronte Autopilot and the model of Simulink is done through customized Simulink blocks: Data Sender and Data Receiver. These blocks must be added and configured in Simulink in order to establish this communication.
Note
Data blocks are provided as an asset of HIL Simulator Release. For additional details on accessing and downloading the software release, consult the Releases section of the Joint Collaboration Framework manual.
Data blocks are blocks of Simulink configured to send or receive certain parameters from the autopilot, allowing the analysis of an Autopilot 1x in the designed simulation. The following diagram summarizes how HIL Simulator operates with Simulink workspace:

Data Sender configuration
The Data Sender block has the following inputs:
| Field | Input size | Required signal format |
|---|---|---|
| Speeds | 1x1 | IAS (knots) |
| LLA | 4x1 | Latitude (deg), Longitude (deg), Altitude MSL (ft.), Altitude AGL (ft.) |
| Navigation velocity | 3x1 |
Velocities East, -Down, -North (m/s)
Important
Some of the fields are inverted (-) |
| Angular velocity | 3x1 |
Pitch rate, Roll rate, Yaw rate (rad/s)
Note
All in body-axis |
| Pitch, Roll, Heading | 3x1 |
Pitch, Roll, Yaw (deg)
Note
All in body-axis euler angles |
| G-Load | 3x1 |
-gNormal, gAxial, gLateral (g)
Important
Some of the fields are inverted (-). |
Steps to send these parameters to Veronte Autopilot:
In Simulink:
-
Ensure that the inputs have the required format and size detailed in the table above.
-
In the Block Parameters menu of the Data Sender block, configure the IP and Port entries according to HIL configuration.
Warning
In the Data Sender block, the 'Port' corresponds to HIL 'Receive Port'.

Simulink Navigation - Data Sender configuration
In 1x PDI Builder:
-
In HIL menu, configure the variables the Autopilot 1x must receive from Simulink simulation apart from the navigation variables.
Important
Navigation variables are automatically shared through HIL (received by 1x). Additional variables to receive will depend on the simulation design and purpose. This is an example.

1x PDI Builder - HIL configuration For more information about this configuration, consult HIL - Configuration section of 1x PDI Builder manual.
Data Receiver configuration
Steps to receive parameters from Veronte Autopilot:
In 1x PDI Builder:
-
In HIL menu, configure the variables the Autopilot 1x must send to Simulink simulation.
Note
The variables to send will depend on the simulation design and purpose. This is an example.

1x PDI Builder - HIL configuration
In Simulink:
-
In the Block Parameters menu of the Data Receiver block, configure the IP and Port entries according to HIL configuration.
Warning
In the Data Receiver block, the 'Host data port' corresponds to HIL 'Send Port'.

Simulink Navigation - Data Receiver configuration -
To access the received variables independently, a Bus Selector block may be added to the Data Receiver block.
This block outputs the selected elements separately, acting as a filter of the received values. In order to select the desired variables, open the Block Parameters menu of the Bus Selector. This is an example:

Bus Selector block - Parameters
Simulation
For running the simulation in Simulink software:
-
Run the designed Simulink model by clickin on
 .
. -
Start HIL simulation. Once Simulink is configured and running, click on
 of HIL Simulator to enable the sending of commands.
© 2025 Embention. All rights reserved.